

This article-guide explains how to reconnect a previously installed wireless printer to the network if you changed your Internet Service Provider (ISP) or purchased a new router. See – Connect to wireless printer.
Some access points (sometimes referred to as routers or hubs) have an automatic connection button called “WPS”, which stands for Wi-Fi Protected Setup.
In this way, approved devices such as your printer can connect to your network without having to enter a password, and your devices can be connected quickly and easily.
This method is by far the easiest way to connect your printer. If your access point has a WPS button, select the “WPS connection method” option below for instructions on connecting using this method.
If your access point does not support WPS, we have provided alternative instructions to connect your HP printer. Therefore, select “Standard connection method” below.
Connect hp printer to wifi
Use Wi-Fi Protected Setup (WPS), HP Smart, or temporarily connect a USB cable to establish a wireless connection between your printer and the network.
Step 1: Connect the printer to WPS
Use WPS to connect the printer to your wireless network.
- Find the WPS button on your router, but don’t press it yet.
If your router does not support WPS, go to the next step to connect the printer to the HP Smart app.
- Turn on the printer. When the printer is in sleep mode, press the Cancel button on the control panel.
- On the printer control panel, press and hold the wireless button for at least 3 seconds or until the wireless light starts to blink.
NOTE: HP Tango printer: Press and hold the Wireless and Power buttons on the back of the printer for 5 seconds. The edge lighting flashes blue to indicate that the printer is in WPS mode.
- Press and hold the WPS button on the router for 3 to 5 seconds or until you see that the WPS connection process has started.
NOTE: The printer stops searching for a WPS connection two minutes after you press the wireless button. If you were unable to press the WPS button within this period, repeat these steps.
As soon as the printer has connected to the wireless network, the blue wireless indicator on the control panel lights up continuously.
If the printer cannot connect to your wireless network, go to the next step.
Step 2: Connect the printer to the HP Smart app
You can also use the HP Smart app to connect the printer to your wifi network.
Windows 10
Use the HP Smart app to connect the printer to your wireless network.
- Your computer must be connected to your wireless network connection.
- Download and install the HP Smart App (in English) from the Microsoft Store on your computer.
- Turn on the printer. When the printer is in sleep mode, press the Cancel button on the control panel.
- Set your printer for your wireless network.
NOTE: You must complete the network setup within 2 hours.
- For most HP printers: Press and hold the Wireless and Cancel buttons until the Wireless and Power lights flash.
- For HP laser printers: Press and hold the wireless button until the warning light flashes. The printer may restart.
- For HP Tango printers: Press and hold the wireless button on the back of the printer for 5 seconds until the edge light blinks blue.
- Open the HP Smart App on your computer and click the plus sign.
- Follow the on-screen instructions to add your printer or set up a new printer.
- When prompted, enter the WEP or WPA (network password) key.
If you don’t know your network password, go to Find your wireless WEP, WPA, and WPA2 password.
- After the printer connects to your wireless network, click Next, and then click Exit Setup.
As soon as the printer has connected to the wireless network, the blue wireless indicator on the control panel lights up continuously.
If the printer cannot connect to your wireless network, go to the next step.
Connect Canon printer to wifi
Are you trying to set up your Canon printer for your WiFi network? Or have you searched for hours quickly and easily on the Internet? Look no further, this is just the guide for you, give it a try!
Connecting your Canon printer to your wireless network should be a breeze when you do the following:
- In order to turn on the printer, press the power button.
- Click the Settings button. Then press the arrow button and press OK as soon as you switch to the device settings.
- Press the arrow button until LAN Settings appears and press OK.
- Press the arrow button until you switch to WLAN setup and press OK.
- The printer starts searching for a WiFi network. In the meantime, the light flashes.
- If the search takes too long, you can click on Stop and call up the WLAN setup (standard setup). Press OK.
- Find your WIFI network by pressing the arrow button and then click on the OK button.
- Type your password for your WIFI network (enter passphrase) and then click on the OK button.
Enter passphrase: 1 indicates that our keyboard is now in a numeric state. Depending on our wifi password, we may need to press * to toggle it to uppercase (enter passphrase: A) and lowercase (enter passphrase: a).
8) Press OK again when Connected appears on the screen.
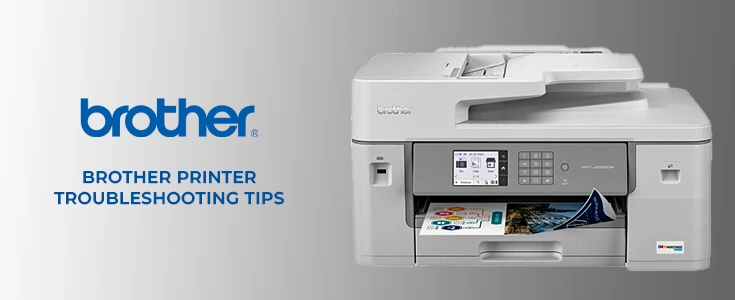
Connect brother printer to wifi
Easy steps to connect your Brother printer to a WIFI network
To begin
- You will need the password and network name for your wireless network (these are usually found on the back of the modem).
- Make sure the printer and computer are turned on
Set up your WIFI connection
- Select the “Menu” button (if you have a touchscreen, choose “Settings” or “Wrench and screwdriver icon” and then “All Settings”).
- Use the arrow keys to scroll down to “Network” and press OK
- Select WiFi
- Use the arrow keys to scroll down and select the setup wizard.
- Press OK (it may take a moment while searching)
- Select your WIFI network (if prompted to use WPS, you can choose NO.)
- Enter your WIFI password and press OK
- You will be asked to “Apply settings?” To press. Press 1 to select “YES”.
- If your password is correct, the message is “Connected”.
- A “Connection OK” report is then printed automatically.
The above mentioned steps apply to the below-mentioned Brother Printer models
MFCJ470DW • MFCJ430W • MFCJ265W • MFCJ615W • DCPJ140W
Conclusion
So, these are the ways you can easily connect your HP, Brother, and Canon printer to Wi-Fi network. Try the above guide to connect your printer to wifi or contact your printer’s official support number. Happy printing!
Also, see our updated article on – wireless printer setup.


Hi Dear, I'm Meenu, and I've written the posts on this blog. I've tried my best to pack them with helpful info to tackle any questions you might have. I hope you find what you're looking for here. Thanks for sticking around till the end!